Running on Ice

AdamRMRRTS1802

How to run fast and efficiently on ice, and how it can improve your efficiency on any surface.

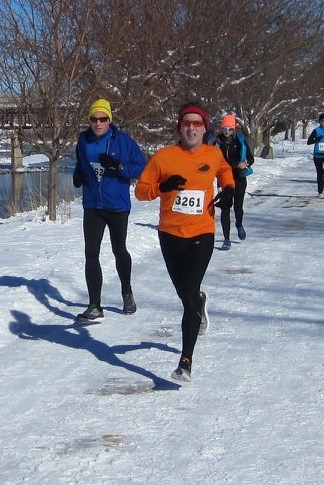
If you live in a place with a real winter, you’re probably going to have to deal with snow and ice when you run. Running on ice does not have to be that treacherous, and can actually improve your running form. In this article, I’ll talk about technique and strategies for running on ice.

This is not about traction devices. FWIW, the only traction device I use is cheap and simple to make screw shoes on hilly & icy trails. I almost never use anything on roads or flat trails.

Hit the ground running
“Pawback” is a key part of an efficient stride. Your foot should be pulling back when it hits the ground, like a cat pawing. And, you should land with your feet under your body mass. This is true whether running on dry or slick ground. If you land with your foot still going forward or even flat, with your foot in front of your body, or on your heels, you are braking and losing momentum. Like driving a car in the snow, your best control is when you are continuing forward.

Shorten your stride. Besides being more efficient, a short, quick (and light) stride gives you more control, and better ability to adjust quickly. With quicker strides, you are landing with less force, thus less likely to slide out of control. And, with lighter, quicker strides, you are better able to quickly adjust your stride and body weight if/when you slip.

We have a natural tendency to lean back and on our heels when we’re afraid. If you do any skiing, you know that’s what most beginners do, and that’s exactly what makes skiing and control harder. The same is true with running. You want to lean forward slightly, stay on the balls or middle of your feet, stride back, and keep moving forward.

This won’t prevent slipping on ice. It may even feel a bit like falling – good running form almost feels like falling forward. Your feet may slip back on ice, like running on loose dirt, but if you keep your momentum moving forward and your feet moving under you, you should stay in balance and hardly notice it.

Powdered or Glazed?
Some surfaces are inherently more dangerous than others.

Snow usually has better traction than ice. Aim for the white stuff, a dusting of snow atop of ice, over glazed ice. Dark patches may indicate ice or dry pavement. That can be hard to distinguish at night or from a distance. At night, I assume it’s ice and am more cautious (unless I know it’s mostly clear). The edges of snow, where it changes to pavement, are often slick. This is where it melts and refreezes as ice. Try to avoid these edges by adjusting your stride. It’s better to take extra short strides, than to lengthen your stride or leap (landing with more force).

If patches of dry pavement are small and scattered, it may be better to just stay on the snow and ice. You risk hitting more edges. And, different surfaces have different feels, and it takes a few strides for your body to adapt. Two or three strides on pavement may take more effort adjusting than it’s worth.

Turning on ice is hard, just like with driving. Slow down and shorten your stride before a curve. Then, go through the curve with very short & quick strides, staying nimble up on the balls of your feet.

Painted road surfaces can be slicker than unpainted pavement. Try to step over or around them, without making abrupt lateral changes.

Changing surfaces can be tricky – pavement to dirt, sidewalk to street, path to bridges. Not only might the snow/ice differ on the new surface, but the feel is different. Subtle cues from your feet, allow your body to automatically make adjustments and stay in balance. When the feel changes, it takes a little time for your body to adapt. If you know it’s icy, or don’t know what it’s like, slow yourself by shortening your stride (not by braking on your heels) before the change, and transition with caution.

Rapid changes in direction or speed can be risky. Look ahead to anticipate changes, and adjust your stride and line before you get there. When you see that you are going to need to change lines, drift over gradually, making small lateral changes, and try to hit any new surface going straight.

Snow can make it easier or harder. Running in a few inches of new snow is a lot of fun. When the snow is soft, you fly right through it. Packed snow gives pretty good traction too, as long as it’s not crusty. Snow can actually make it easier on trails, by filling the gaps between rocks.

Old, crusty snow is different than ice, but can be as hard to run on. You don’t know what’s underneath – soft snow, ice, hard ridges – often until it’s too late. When the snow is more than a few inches deep, the crust can cut your ankles, and hard ridges of snow can twist them. If you can’t avoid deep crust or exposed areas of hard, uneven snow, go very slow, and walk if needed. If there’s lots of it, find somewhere else to run.

When running icy/snowy hills, control is best when your feet are under your body mass. Shortening your stride even more, keeps your feet under you more. Going uphill, try to hit the hill straight, and carry momentum into the hill. Think of lifting your knee up to initiate the next stride and leaning into the hill (from the ankle, not bending at the waist), using gravity to help propel you forward, rather than pushing down against the slick ground. Slow yourself before a downhill. Then, hit the descent as straight as possible. Stay up on the balls of your feet and don’t lean back. You lose control and can’t adjust your balance from your heels, or when your feet are in front of you. It’s better to tip-toe down on your toes, than to slide down on your heels. If it’s really bad, you can turn your feet and side step up or down.

Practice
Running on ice takes practice to learn the technique, and experience to gain confidence. It takes practice to learn how to fall forward, and how to be comfortable doing it. That’s good running form – using gravity and momentum to your advantage – dry or slick. Start by practicing on dry ground. Lean forward – keep your body straight, leaning from your ankles, not bending over at your waist – stride quickly and kick your heels back until it starts to feel like you’re falling. Find your comfort limit, and then lean a little beyond it. See how fast you can go by striding faster, not longer. Over time, you’ll become more and more comfortable with this. When you take it to the snow and ice, you’ll want to tone it down a bit – slightly less forward lean, and slower running speed; though still leaning forward and with a fast stride rate.

I actually look forward to racing in tricky conditions. While my times may be slower, I know that I handle them better than most other runners, and can use it to my competitive advantage. The 2005 Greenland Trail 50km had just about every trail condition possible – dry, snow, ice, slush, mud – at different parts of the course, and different times during the day. I remember passing lots of runners, gingerly taking 7 or 8 steps to get through a snow drift or ice patch, while I cruised through with just 1 or 2 steps. There was a race at Cherry Creek, in February, with ice and slush on the road. I took straight lines through slush and ice, maintaining my speed, while others slowed and/or maneuvered wide around slick spots. I don’t have to be that aggressive when I’m just out for a training run, but I don’t fear the ice either.

You don’t have to be afraid of the ice and snow. While you need to be more cautious, it doesn’t have to keep you from running or racing. Practice. Build confidence. Get out there and have fun.

3/19 – An article by Alex Hutchinson, Sweat Science guru and author of Endure – https://www.outsideonline.com/2392683/treadmill-vs-outside-running

Be smart. Train Smart.

Training Inside: treadmills, stair climbers, and other torture devices

Most runners I know don’t like training inside. They hate the treadmill, sometimes called the dreadmill or hamster wheel. I don’t like it either. However, there are times when training inside just makes sense – when it’s extremely cold, when you’re traveling, or when you’re recovering from an injury. Yes you can run on snow and ice, and many of you would much rather do that than spend time on a treadmill. Some workouts, speed work, are difficult, nearly impossible to do efficiently and safely outside when it’s very cold, you’re bundled in clothing, and the footing is questionable. There’s more than just the treadmill. Stair steppers are a great way to simulate hills, and low impact. Also consider ellipticals and spin bikes.

Treadmilll1

Treadmills
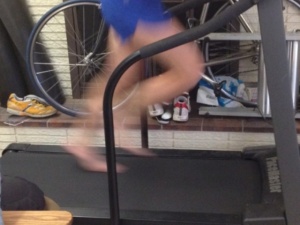
Running on a treadmill is running, though not quite the same as running on a road or trail. Treadmills take some getting used to – the feel of running in a confined space, running on a moving belt, and using the controls. Start slow (they typically start at a slow walk), getting used to the feel of running on a treadmill. Then play with the controls – adjusting the speed and incline – to get used to how they work, how quickly the speed and incline change, and adjusting the controls while running.

The treadmill forces you into a set pace. This can be beneficial, training your body to run a target pace, teaching you the mental discipline to keep a steady pace, and to stay focused for longer races. In 2000, Christine Clark won the US marathon trials, training almost exclusively on a treadmill, while living in Anchorage. With the trials in March, training outside through the Alaskan winter wasn’t practical. She used this strategy, going 17-18 miles at her target (5:30) pace. It’s hard to let your mind wander on the treadmill like it does outside; you have to maintain some focus to stay on the treadmill. If you find it hard to stay focused as long as you want to run, make minor, temporary variations in speed and/or incline for a break before returning to your target. It can also help to break a longer run into segments. For example, start with running for just 15 minutes. Then, once you’ve hit that target, shoot for another 15 minutes, then another, and another. Before you know it, you’ve hit your target of an hour or more.

Speed training can be difficult and unsafe to do when the air is frigid, you’re bundled in layers, and the footing is slippery. However, it can be quite effective on a treadmill. Many treadmills have pre-set interval programs that automatically adjust speed and incline. Some allow you to program your own custom programs. Personally, I prefer making my own changes manually. It takes a bit of practice to change the settings, especially while running hard. Although I never hold on while running, sometimes I’ll briefly put my on hand on the rail or panel while I’m changing speed/incline. Note that it takes several seconds change the settings, and for the belt to move to the new settings.

It’s easier to do intervals on the treadmill by time, rather than distance. The time display is usually more prominent than distance, and it’s easier to start on and keep track of whole and half minutes, than fractions of a mile. Because of the act of changing the settings, and the fact that it takes a few seconds for the treadmill to adjust, longer intervals are easier than short sprints. For example, I might do 3:00 hard at 10mph (6:00/mi pace), with 1:30 recovery at 7mph (8:34/mi). Note that unlike a track, the speed up and slow down is gradual, and you’re not going to stop and/or walk. Tempo runs and tempo/cruise intervals are even easie because you don’t have to change the speed that often or that much. Short sprints are hard to doI don’t like to do intervals that are too short, typically not shorter than 2:30 hard, slowing it down by 2-3mph for the recovery interval.

Incline intervals can be fun, and are a good way to train for hills. I’ll stay at my long run speed, crank the incline up to 10% or more, then see how long I can maintain my stride, perhaps a minute or two. There are fewer button presses and a quicker adjustment with incline vs. speed changes, so this is a way to simulate short intervals. I simulate striders this way, as my last warm-up before starting an interval workout.

For most, running on a treadmill is easier than the roads at the same speed. Although, some of you might find it harder, depending on your stride efficiency. If you’re new to treadmill running, start at a slower pace than you would run outside for a few minutes. Then, gradually increase the speed. As you approach your normal outdoor pace, see how it feels compared to outside. Find the speeds that match the feel, not necessarily the pace.

Most treadmills display speed in mph rather than min/mi. You may need to make the calculation in your head. See my conversion table below.

You may have heard that you need a 1% incline to be the same as running outside. The amount of adjustment partially depends on how fast you run. A 1% incline will offset the lack or wind resistance for many mid-pack runners, about 8:00-10:00/mi pace. Faster runners generate more wind resistance so would need a higher incline, and slower runners might not need any. Any adjustment also depends on how efficent your stride is on a revolving belt vs. a stationary road. There are some benefits of not making any adjustments. Spending some time running at a slightly faster than normal speed trains your body to move at a faster speed. See my How to Run Fast article.

If necessary, you can step off the side. Most treadmills have non-slip pads on both sides of the moving belt. However, before stepping back on, stop, or significantly slow the treadmill speed before stepping back on. Stepping on a rapidly moving treadmill belt can result in a nasty fall.

Stair Steppers
Stair stepper machines are the closest non-treadmill machine to running. They provide a great simulation of hill running. They’re also good when you need some low impact training. I used them frequently when recovering from my last ankle surgery, and when I had a calf strain. It allowed me to run without the stress of landing (using the type where the foot platform goes up and down, not the type with rotating stairs). It’s easy to get your heart rate up, so it’s good for a tempo workout. Use the handrails as little as possible, and only for balance, not to support your weight.

Ellipticals
I don’t like elliptical trainers. While the leg rotation is similar to running, it’s not running. There’s resistance in the wrong spots – namely at the top of the stride, which makes it feel like you are striding way in front of your body. Also, the kick back (follow through behind you) is too short. They can be good if you are recovering from an injury and need a low impact workout, but I prefer stair steppers.

Spin bikes
Biking is biking, and running is running. However, biking builds strength (i.e., good for hills), is good cross-training (i.e., builds strength in areas that running misses), and is low impact.

The term “spinning” means different things to different people. The term comes from bike racing, where it means using an easy gear at a high cadence. It’s often done in warm-up, cool-down, or on recovery days to help loosen up sore muscles. It can mean a lot of different things at a health club, and a spin class can be a lot of different things. Some spin classes simulate training on a real bike. A number of bike shops offer classes where you bring your own bike and ride it on a trainer (either your own, or one provided by the store). However, a lot of health club spin classes are different than riding a bike outside where the bike just happens to be a tool for fitness training. Either way, it can be a good workout.

If you’re new to spin bikes, get there early and spend a couple of minutes adjusting the bike. Set the seat height so that your legs are not quite straight at the bottom of the pedal stroke – most of your power is as your legs are straighter, but going completely straight, or even hyper extending the knee, can be damaging. Adjust the seat forward and back, and the handle bars up and down, so that it feel comfortable. As you move the seat forward and back, this will change the distance to the pedals, so you may have to readjust your seat height. Test it out both seated and standing (some spin drills call for you to stand while pedaling). Play around with the resistance knob to see how different resistances feel sitting vs. standing. Heavy resistance may affect the fit and feel. If you’re new to cycling, you’re likely to start out more upright than experienced riders, and adjust to be more bent over over time. If you’re an experienced rider, but new to spin bikes, note that it’s hard to get a spin bike to feel like your regular bike.

Be smart. Train smart.

Adam
When in doubt, run uphill!
https://runuphillracing.com/